A loose bike chain is an issue riders are likely to experience every once in a while (depending on what is causing it.) Fortunately, it is a problem that any biker, both amateur and professional, can fix.
Below is an all-inclusive guide on how to tighten a bike chain on a single-gear bicycle and one with a derailleur. But first, let’s take a look at the reasons your bike chain may be loose in the first place.
Reasons Why Your Bike Chain Is Loose
Knowing the various reasons your bike chain is loose goes a long way in helping you determine whether you need to tighten it or you should replace it with a new one.
- Elongation Due Wear
A common reason bike chains may keep on becoming loose is elongation due to wear. Typically, a bicycle chain increases in length as it wears. The chain’s bushings increase in diameter as it wears, causing the pins to groove out.
Having an elongated bike due to wear can cause many issues apart from having to deal with a loose chain. The chain may cause the cassette cog to wear out rapidly because it rolls higher up on the cassette’s teeth as it increases in length, reducing the point of contact between the two components.
- Having the Wrong Chain Length
Another reason your bike chain is loose is that you may have the wrong chain length for your bicycle. So, how do I know what length of chain I need for a bike? You may ask. There are several ways to determine your bike’s correct bike chain length.
For starters, you can align your old bike chain with your new one(that is, if you are replacing it.) This is the simplest way to find your bicycle’s ideal bike chain length. All you have to do is find a chain that is the same length as your current chain.
First, place the old chain parallel to the new chain you want to replace it with on a flat surface. Ensure that the outer plates of the old chain are well aligned with the outer plates of the new one. The inner plates of the old chain should also perfectly align with the inner plates of the new one.
Another method to determine the correct bike chain length for your bicycle is using the “largest cog and largest chainring” method. This is also the simplest method to use if you don’t have the old chain as a reference.
So, first, shift your front derailleur to the largest chainring you can identify. Then, shift the rear derailleur to the smallest cog.
Then, begin wrapping the new bike chain around the largest rear cog all the way to the largest front chainring. You can do this by passing the end of the chain over the frontal portion of the rear derailleur and then over the largest chainring at the front derailleur. Make sure you’re using the side with inner plates. Once you’ve done that, pull the lower portion of the chain to see if it fits.
- Misaligned Derailleurs
Loose bike chains may also be caused by misaligned derailleurs. When both derailleurs aren’t correctly aligned, they make it challenging for the chain to shift from one gear to another. This can cause it to skip gears, leading it to become loose. That is why it’s important to adjust the front and rear derailleur when necessary.

1. How to Tighten a Bike Chain On a Single Gear Bike
A single-gear bicycle has a one-gear ratio, meaning it doesn’t have a derailleur hanger or a shifter that helps adjust your cycling speed according to the terrain you’re riding on.
Bike chains on single-gear bicycles tend to last longer than those on bikes with derailleurs because they don’t move from one sprocket to another during rides. However, since single geared bikes require riders to pedal more, which exerts more pressure on the bike chain, its durability may be affected compared to bikes with derailleurs.
With that being said, here’s a step-by-step guide on tightening a bike chain on a single-gear bike.
Check out: How to Remove Rust from Bike Chain
How to Fix a Loose Bike Chain On a Single-Gear Bike
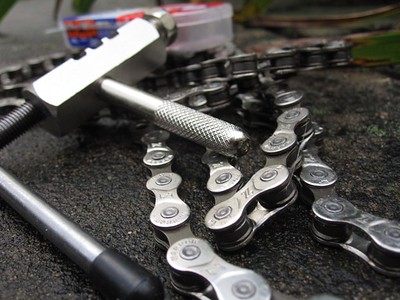
Tools
To tighten a loose chain on a bike with a single gear ratio, you’ll need the following tools:
- Socket wrench
- Bicycle chain lube
- A bike stand(if you don’t have a flat surface)
- Gloves(if you prefer not to get your hands dirty)
Step One: Flip Your Bike Upside Down
First, turn your bike upside down with the saddle and handlebars facing downwards and place it on a bike stand or a flat surface. Doing so will allow you to work on the bike chain easily.
Step Two: Loosen the Rear Axle
The first thing you need to do is loosen the rear axle. This will allow you to pull back the rear wheel to tighten the bike chain. To do so, you’ll need to remove the rear axle nuts using a socket wrench. Remember to turn the nuts counterclockwise to loosen them.
Step Three: Begin Pulling Back the Rear Tire
Once you’ve loosened up the rear axle, start pulling back the rear tire. Doing so will begin tightening the bike chain. Continue to do so until you achieve the perfect tension on your bike chain.
Speaking of tension, how tight should the chain be on a single-speed bicycle? Well, the rule of thumb is that the bike chain should be able to move about half an inch in either direction (up or down) with ease after you tighten it.
So, be extra keen when pulling back the rear tire to tighten the bike chain. Otherwise, your chain may become too tight, leading to other parts like pedals not functioning properly.
Step Four: Put the Rear Tire Back In Place
Once you’re satisfied with your bike chain’s tension, proceed to put your rear tire back in its place. To do so, you’ll need to screw the rear axle nuts back into the rear axle using a socket wrench. Remember to turn the nuts clockwise this time.
Step Five: Test Out Your Bicycle
Now it’s time to test out your bicycle. Go ahead and take it out for a ride. As we mentioned earlier, the bike chain should be able to move half an inch upwards and downwards without any difficulties. Your pedals should also move easily. If they don’t, your chain may be too tight.
Another thing you should pay attention to is the rear tire. We recommend spinning it to ensure that it is moving as it should. Typically, it should move without getting into contact with the bike frame or the chain. If it does, then you may have put it back incorrectly. Also, don’t forget to clean and lubricate your bike chain with a lube of your choice.
2. How to Tighten a Bike Chain On a Bike With a Derailleur

A derailleur is a mechanism on multiple-geared bicycles that changes gears by shifting the chain from one sprocket to another. Typically, multi-geared bikes have front and rear derailleurs.
Bike chains on single-gear bicycles tend to be wider than those on bikes with derailleurs. This is because chains on single-gear bicycles must be robust enough to withstand the pressure from pedaling, especially when riding on hilly terrains.
So, how do you tighten a loose bike chain on a bicycle with a derailleur? Read on to find out.
Tools – How to Fix a Loose Bike Chain On a Bicycle With a Derailleur
You’ll need the following tools:
- An appropriate screwdriver
- Socket wrench
- Bike chain lubricant
- A bike stand (if you don’t have a flat surface)
- Gloves (if you don’t want your hands getting all dirty)
Step One: Turn the Bike Upside Down
As we mentioned earlier, turning the bike upside down and placing it on a bicycle stand or a flat surface will enable you to work on the bike chain more easily.
Step Two: Tighten the Body Angle (B) Screw If Necessary
Typically, a derailleur’s body-angle (B) screw controls the space between the bottom of the cassette cogs and the guide pulley(the upper pulley on the derailleur.)
While tightening this screw helps adjust the rear derailleur, it is also responsible for a percentage of the bike chain’s tension. Usually, the screw has the letter “B” next to it on the derailleur.
Proceed to tighten the screw by turning it clockwise using a screwdriver. Remember, there has to be a gap of about 4-6mm between the largest cassette cog and the guide pulley. So, be careful not to tighten it too much. If the bike chain is still loose at this point, you’ll need to adjust it from the rear wheel.
Check out: How Much Does a Bike Weigh?
Step Three: Disconnect the Brakes
Disconnect the brakes from the brake cable, then lift the lever or quick release to access the rear wheel.
Step Four: Pull Back the Rear Axle
Now begin pulling the rear wheel axle towards the rear dropouts to increase the bike chain tension. We recommend doing this slowly to avoid overtightening the bike chain.
Each time you pull the rear axle, lower the brake lever or quick release to check the bike chain tension. Repeat this process until you achieve your ideal tightness. Remember to clean and lubricate your chain if needed.
Step Five: Put Everything Back Together
Reconnect the brakes to the brake cable and ensure the quick release or brake lever is in the proper position. Put the rear wheel back in place and ensure it doesn’t get into contact with the bike frame or chain while it rotates.
Now that we’ve looked at how to tighten a bike chain on a single-gear bicycle and one with a derailleur, here are a few tips on maintaining your bike chain.
How to Maintain Your Bike Chain
A bike chain is one of the vital parts of a bicycle as it propels the power from pedaling to the wheels, enabling your bike to move. So, maintaining it can not only increase its durability but also prevent it from becoming loose.
Here are a few tips on how to maintain your bike chain.
Clean Your Bike Chain
An excellent way to prolong your chain’s life and enable it to perform perfectly is to clean it regularly. As you ride your bicycle, most of its components, including the chain, collect dust and other debris. The accumulation of these particles increases friction at the sliding surfaces of each chain link, reducing its efficiency.
Dirt and other debris caught between parts of a bike chain can also cause it to produce an annoying squeaky sound. So, it’s vital to clean your bike chain on a regular basis. However, it’s advisable not to wash it too thoroughly as you may strip off its factory lube, reducing its durability.
Lubricate Your Bike Chain
Apart from cleaning your chain, it’s also important to lubricate it regularly. Lubricating reduces the friction between the chain’s moving parts, increasing its durability.
Lubrication also protects the chain’s moving components from rust and other forms of wear due to getting into contact with dirt, dust, mud, and other debris. However, you should be careful not over lubricate your bike chain as it may attract dust and other debris, which may negatively affect its efficiency.
So, how often should one lubricate their chain? This mainly depends on how often you ride your bicycle. If you ride your bike regularly, it’s recommendable to lubricate it at least once a month.
Another common question about lubricating a bike chain is whether to use a wet or dry lube. This depends on the weather conditions. Wet lube is ideal for wet weather conditions like snow as it is resistant to water. However, it attracts dirt and dust more easily, which is quite a disadvantage.
On the other hand, dry lube is ideal for dry weather as it attracts less dust and dirt. However, you’ll need to lubricate your bike chain more often as the dry lube may not reduce friction as much as wet lube does.
Check out: How Long Do Bike Tires Last?
FAQs – How to Tighten a Bike Chain
Q: Why Is My Bicycle Chain Loose?
A: There are many reasons why a bike chain may be loose. For starters, you may have the wrong chain length for your bicycle, your derailleurs may be misaligned, or your chain may be elongated due to wear. It’s important first to identify why your chain is becoming loose and then find the appropriate solution.
Q: Why Does My Chain Slip When I Pedal Hard?
A: Chain slipping/skipping occurs due to several reasons. Your chain may be too long; your shift cables may become loose, the derailleurs may be misaligned, and so on.
Q: Why Does My Chain Go Slack When I Stop Pedaling?
A: If your chain gets slack when you stop pedaling, your freehub or freewheel may be dirty. Usually, dirt, other debris, and chain lube may get caught up between the freehub bearings, preventing it from moving. Fortunately, you can clean it. However, it’s advisable to be careful when taking apart its bearings while cleaning it to avoid losing them.
Q: How Do You Adjust the Bike Chain Tension?
A: Adjusting your bike’s tension depends on the type of bicycle you have. It’s recommendable to refer to guides( like this one) to adjust your bike’s tension. Better yet, you can also allow a professional to do it.
Q: What Happens When Bike Chain Is Loose?
A: For starters, your chain will start skipping. Your drivetrain may also experience wear rapidly, and worst of all, your chain may start dropping, putting you at risk of injuring your feet.
Conclusion – How to Tighten a Bike Chain
Besides increasing its efficiency, tightening a bike chain goes a long way in preventing other problems with other components like the cassette cogs. We recommend having a professional do it for you if you’re not sure how to tighten a bike chain.